Posts
How to create and edit posts.
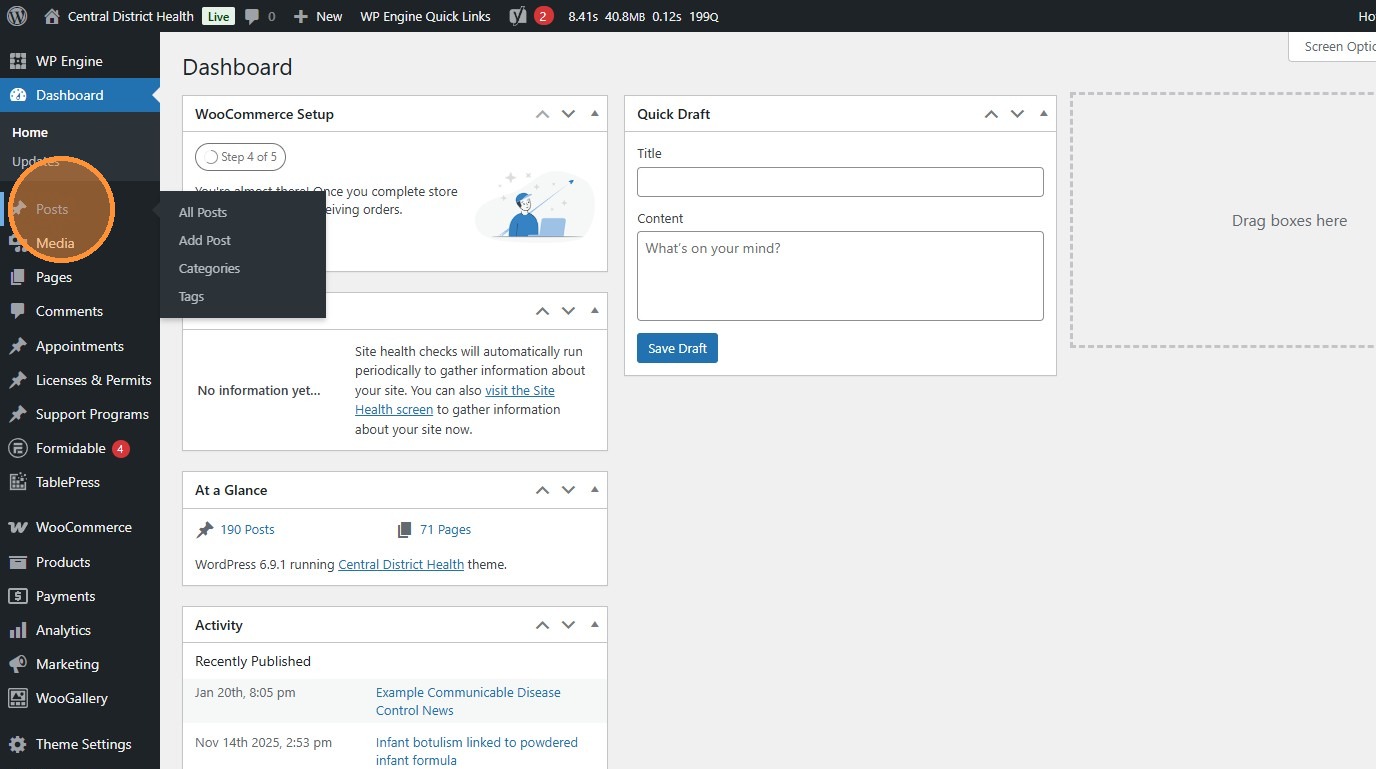
1. Navigate to https://cdh.idaho.gov/wp-admin/ and click “Posts”.
Section titled “1. Navigate to https://cdh.idaho.gov/wp-admin/ and click “Posts”.”This is where you can edit all of the simpler pages on the site, mainly News pieces. “Pages” make up most of the site, and are the subject of their own tutorial.
2. Click “Add Post” to create a new post…
Section titled “2. Click “Add Post” to create a new post…”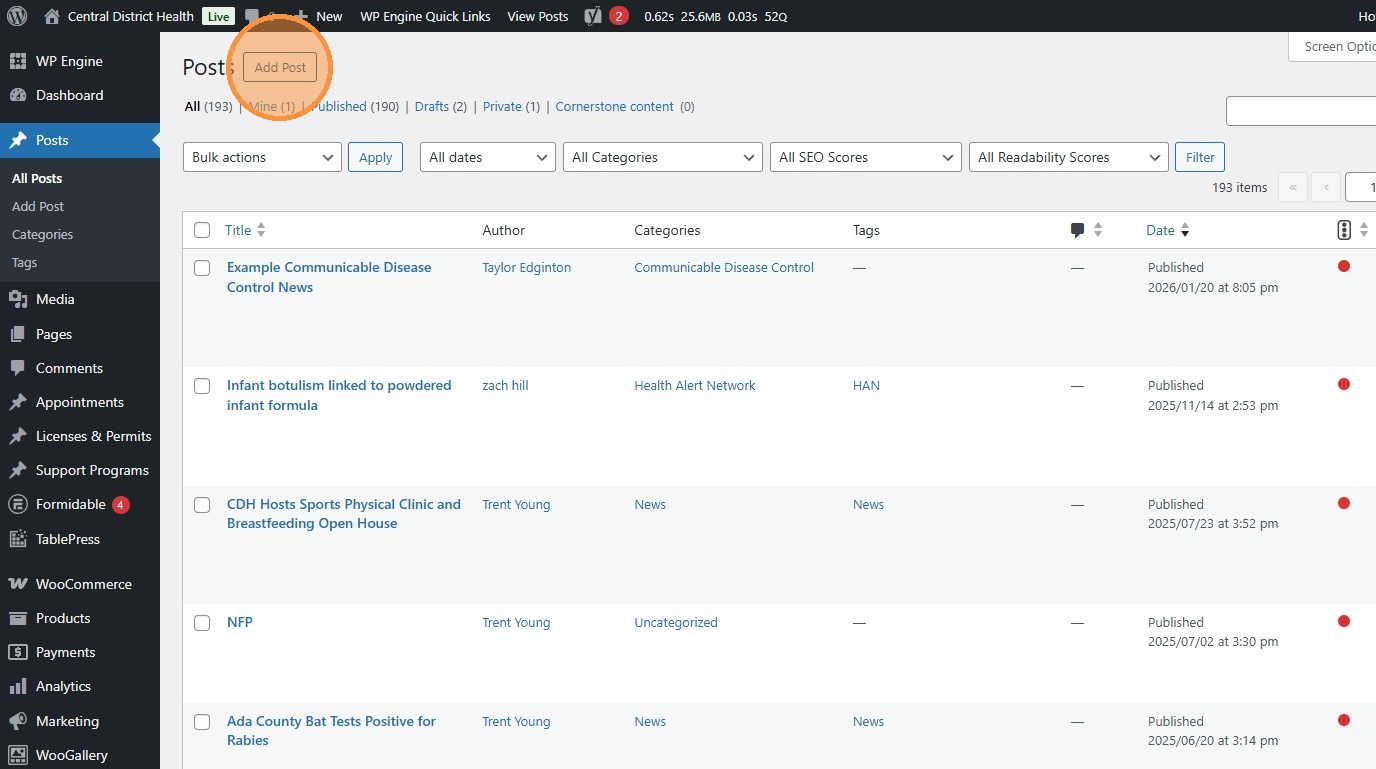
3. …or find an existing post to update and click “Edit”.
Section titled “3. …or find an existing post to update and click “Edit”.”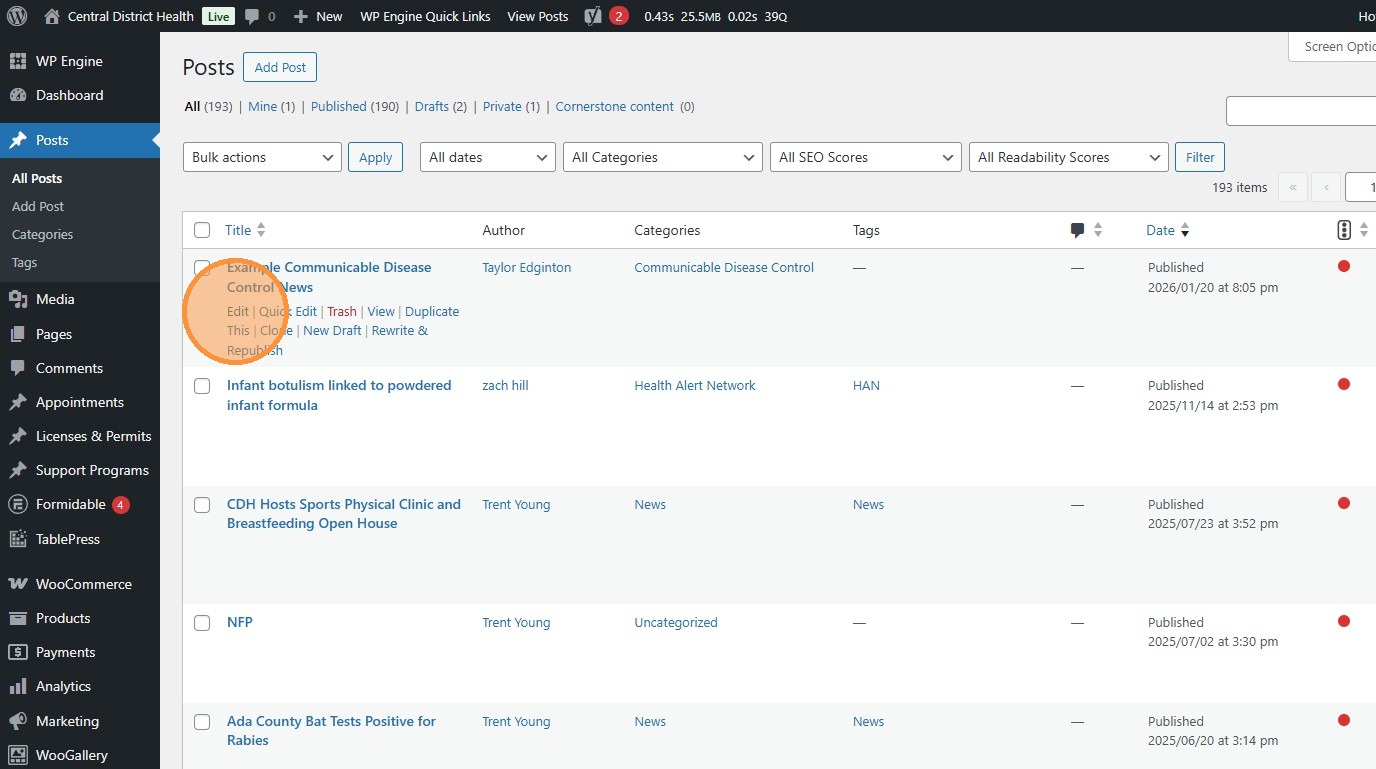
4. Use this text box to edit the post’s title.
Section titled “4. Use this text box to edit the post’s title.”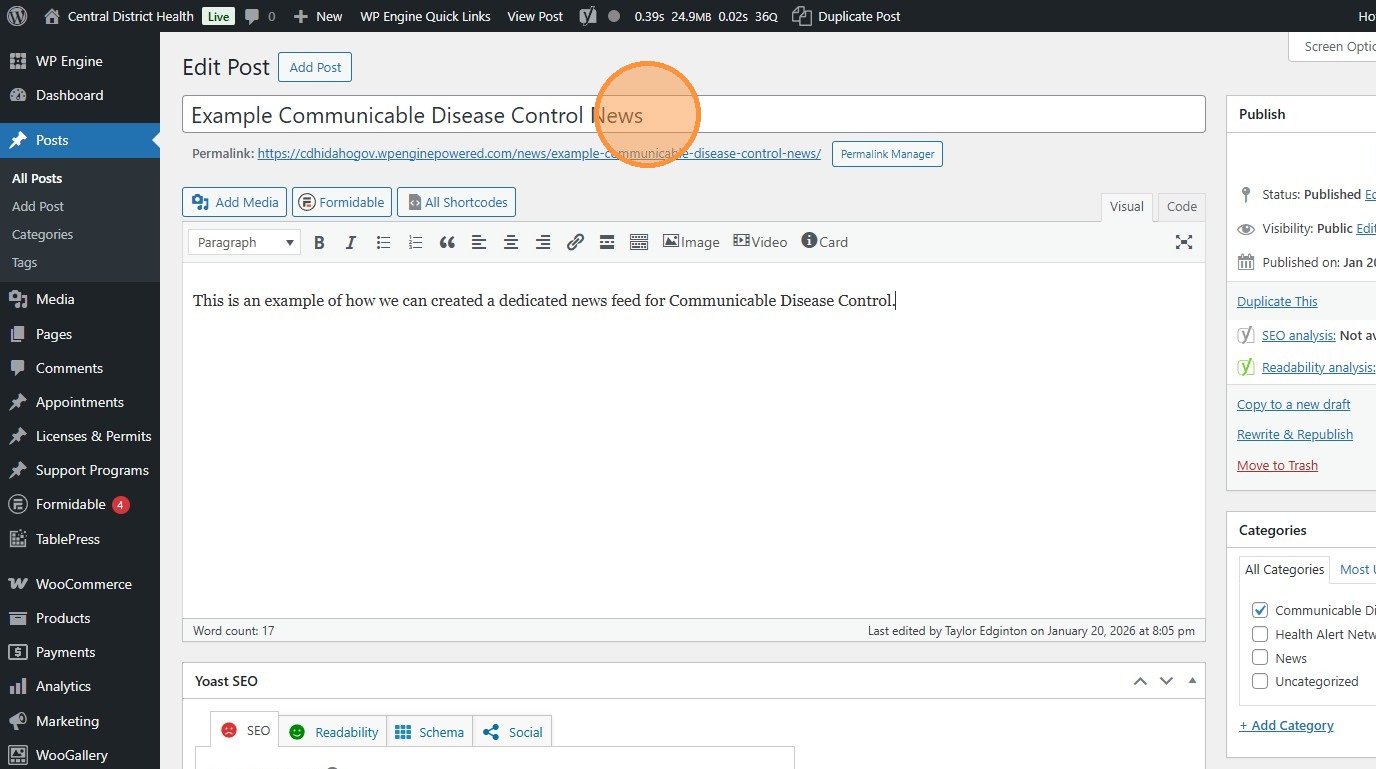
5. Click this text box to edit a post’s content.
Section titled “5. Click this text box to edit a post’s content.”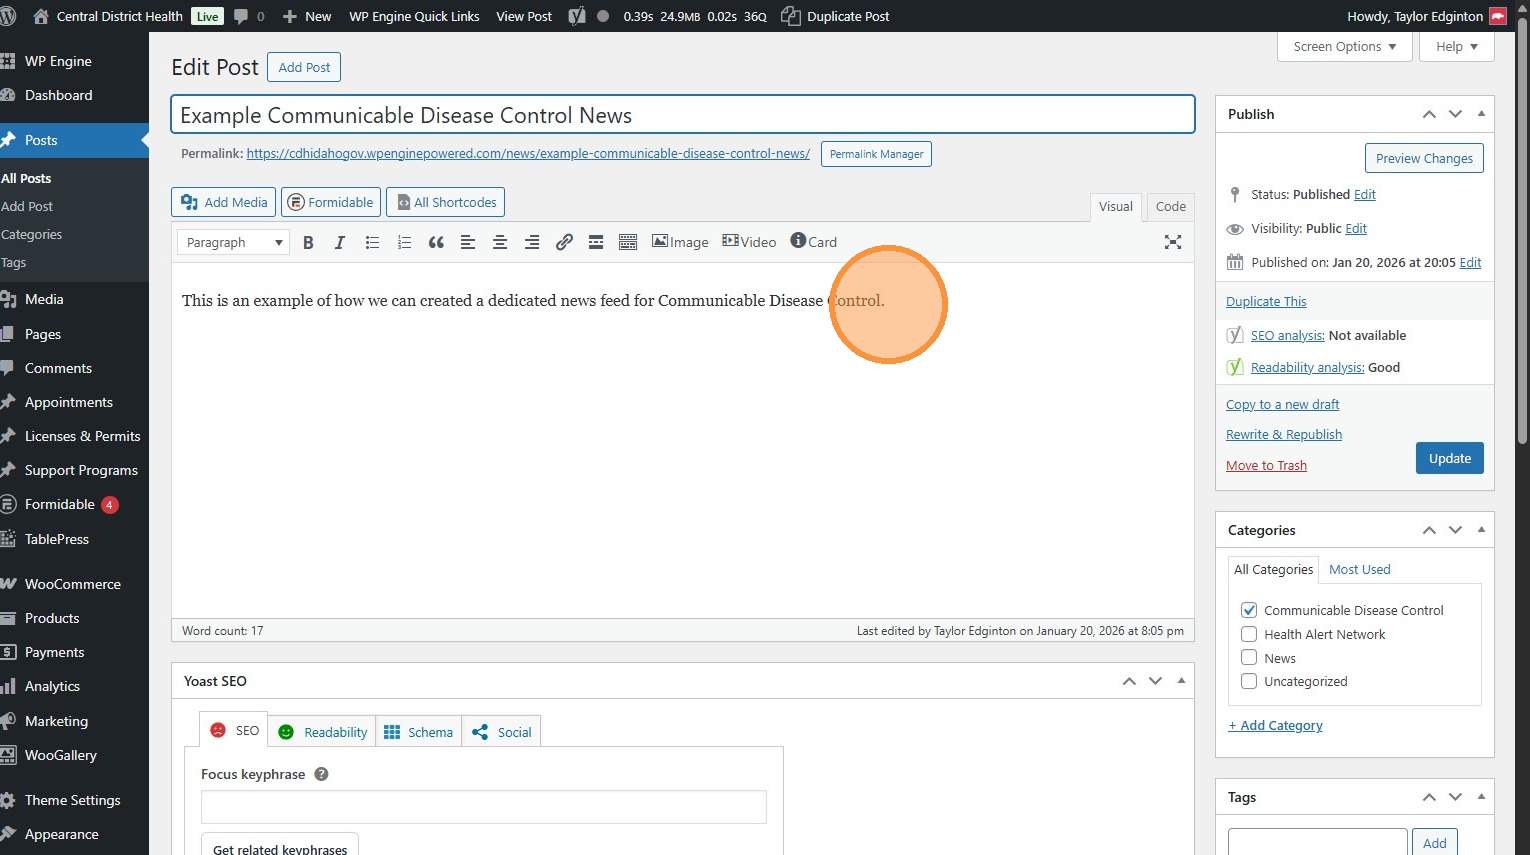
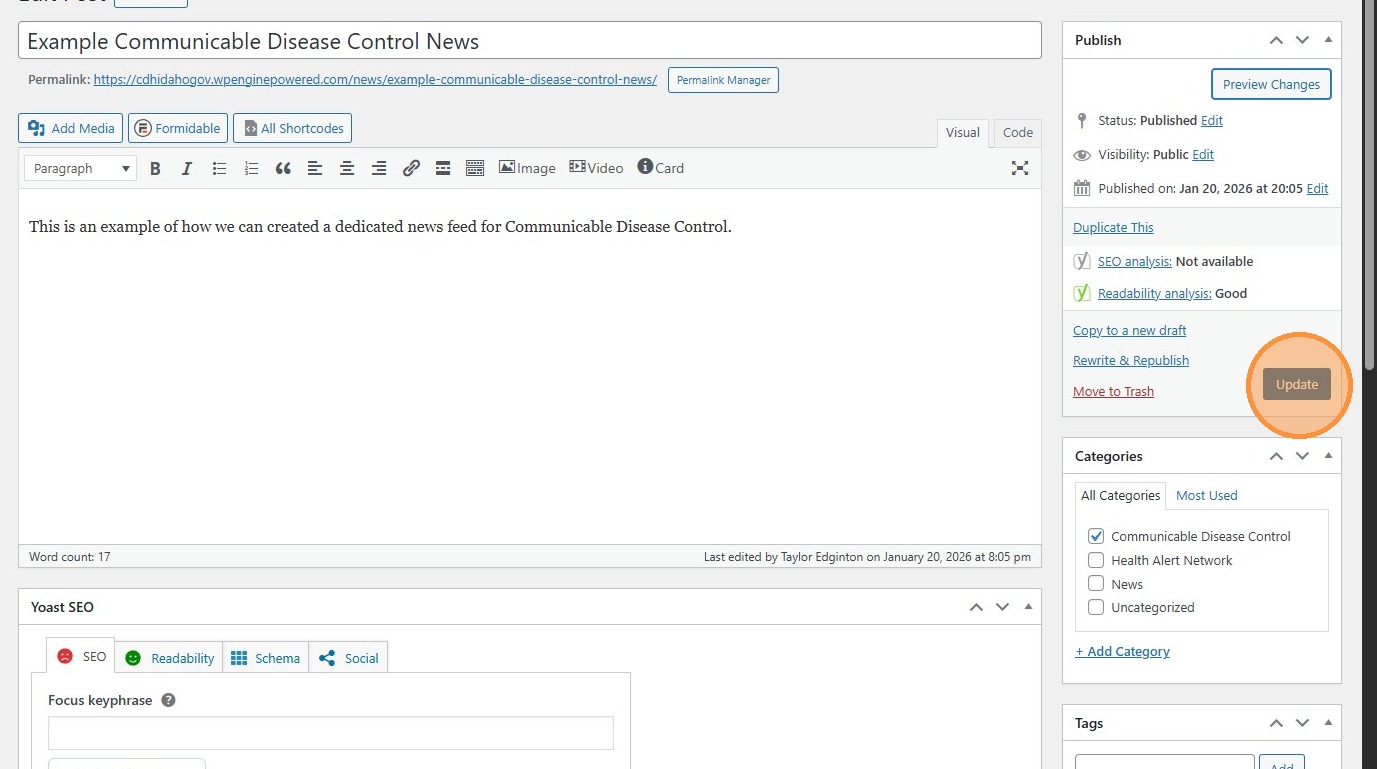
6. Click the “Permalink Manager” (or “Edit”) button to change the post’s URL.
Section titled “6. Click the “Permalink Manager” (or “Edit”) button to change the post’s URL.”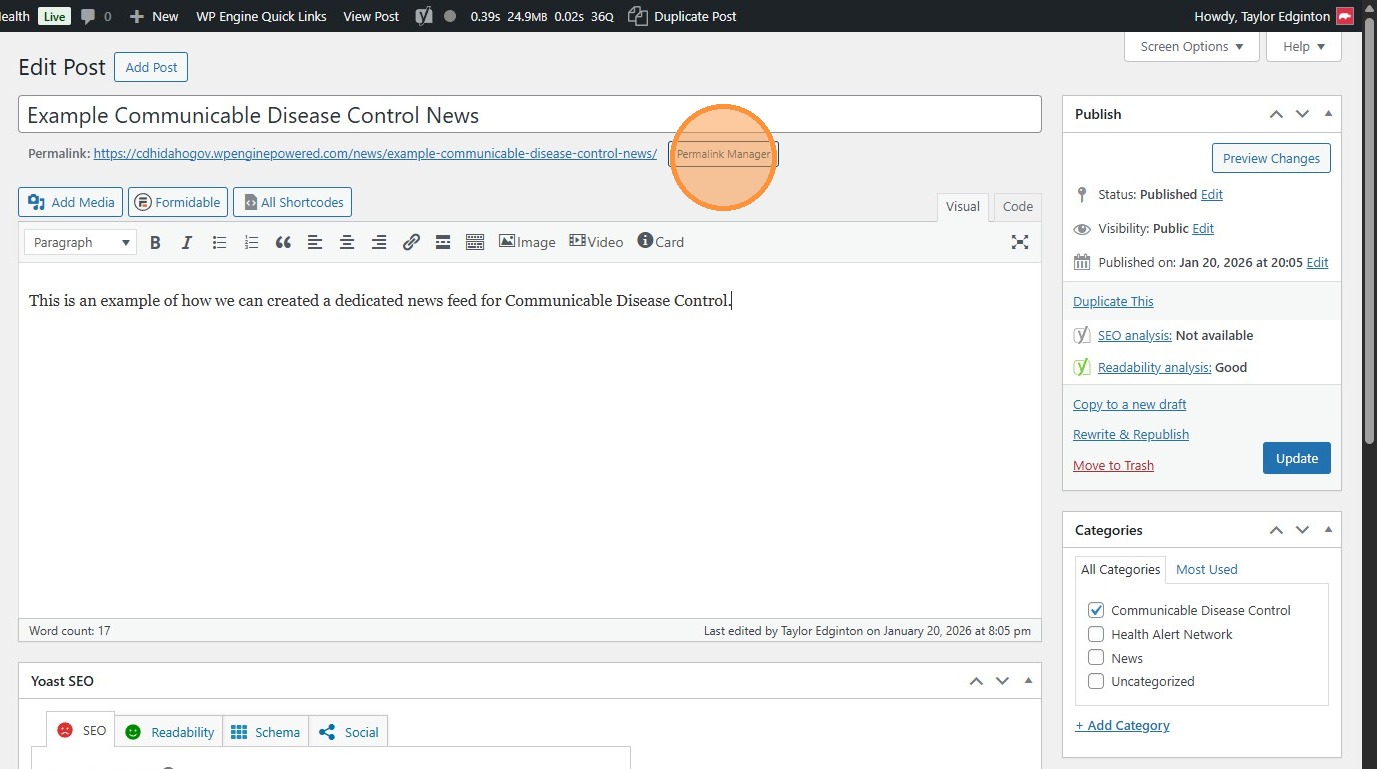
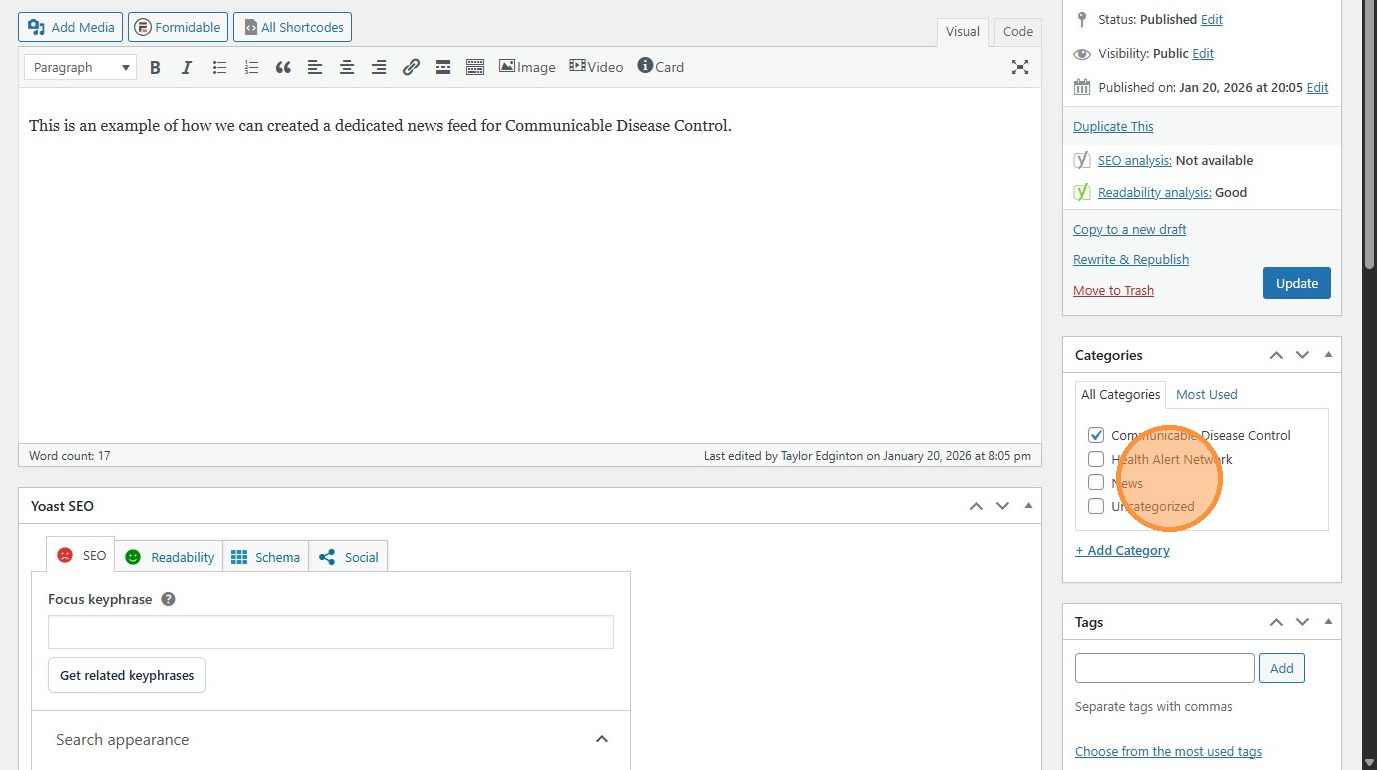
7. Use these checkboxes to categorize the post.
Section titled “7. Use these checkboxes to categorize the post.”These will change when the post appears on a Page (see step 1 for distinction).
8. While editing a Page, the News module will display Posts.
Section titled “8. While editing a Page, the News module will display Posts.”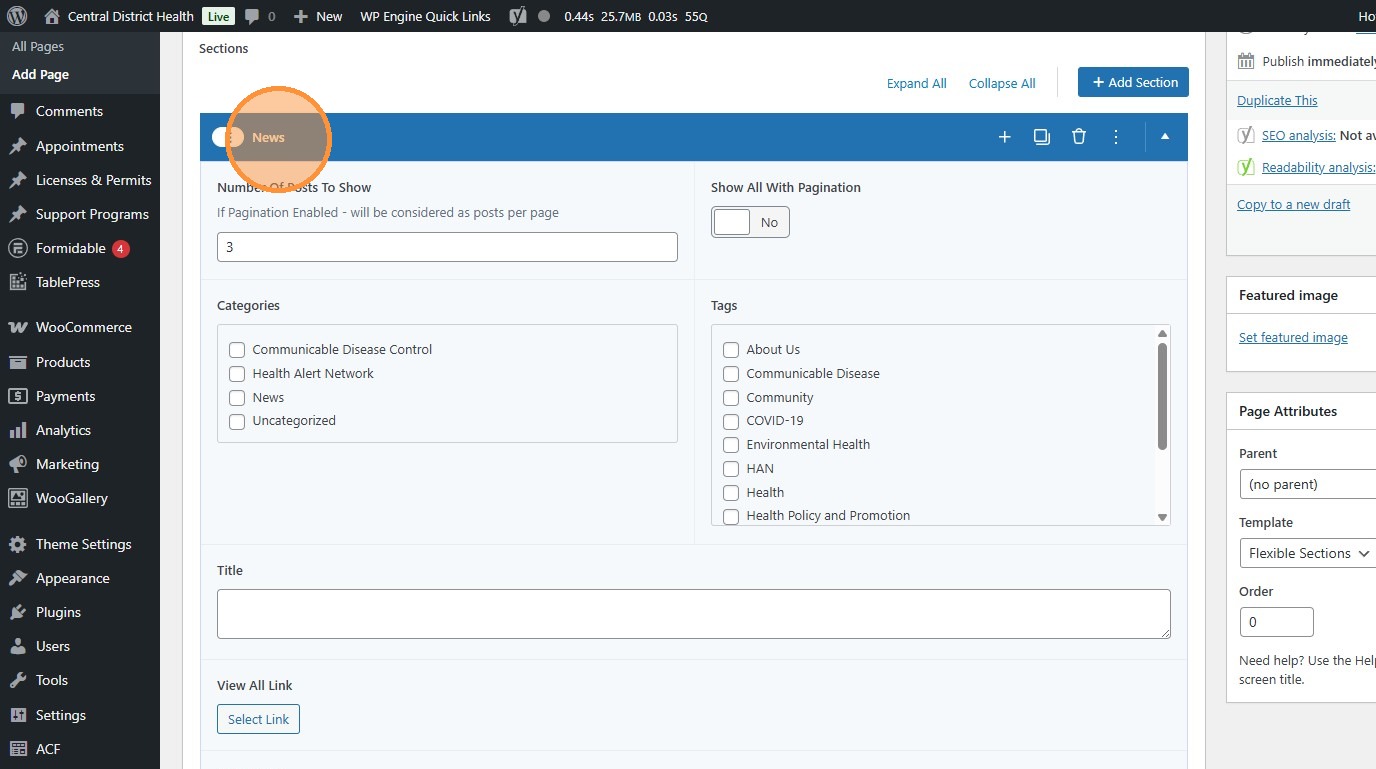
9. Use this field to choose which categories of post appear in the module.
Section titled “9. Use this field to choose which categories of post appear in the module.”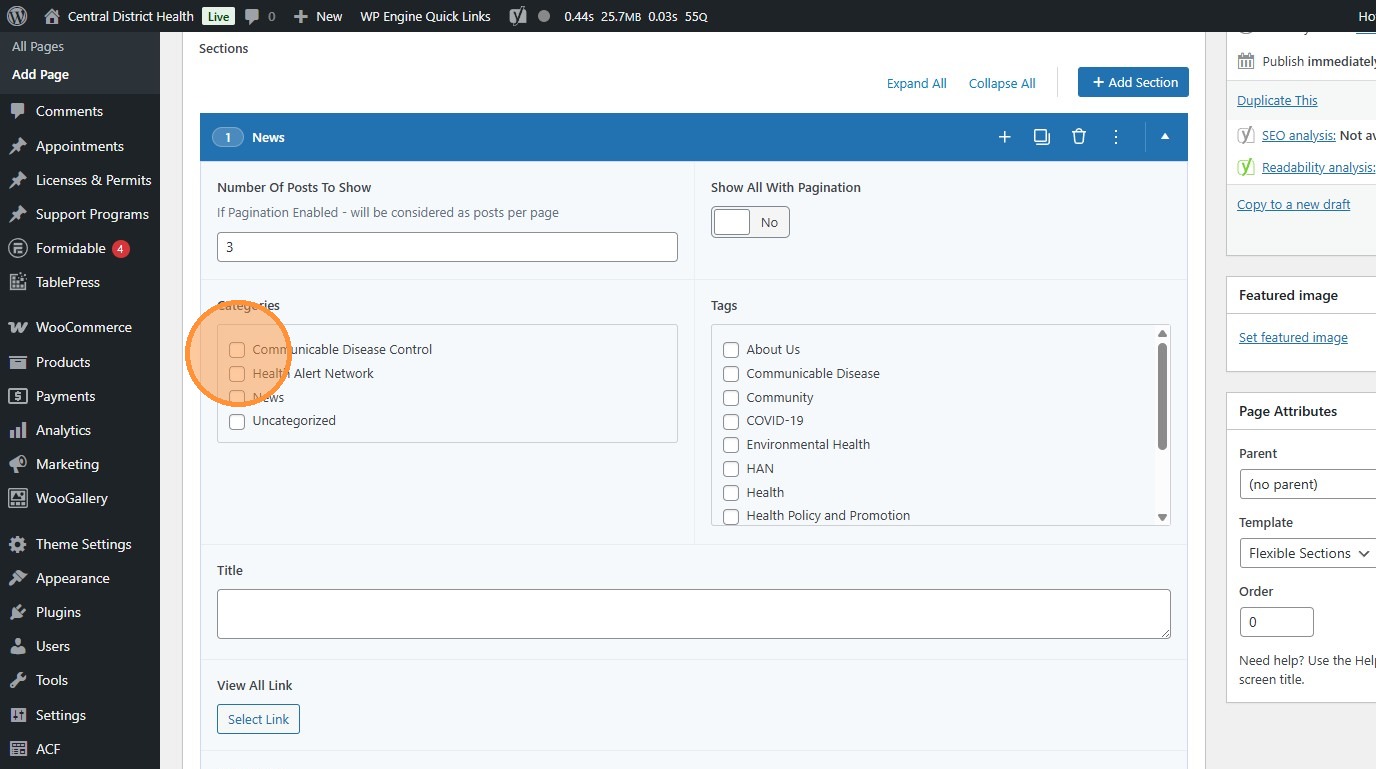
10. Back to posts.
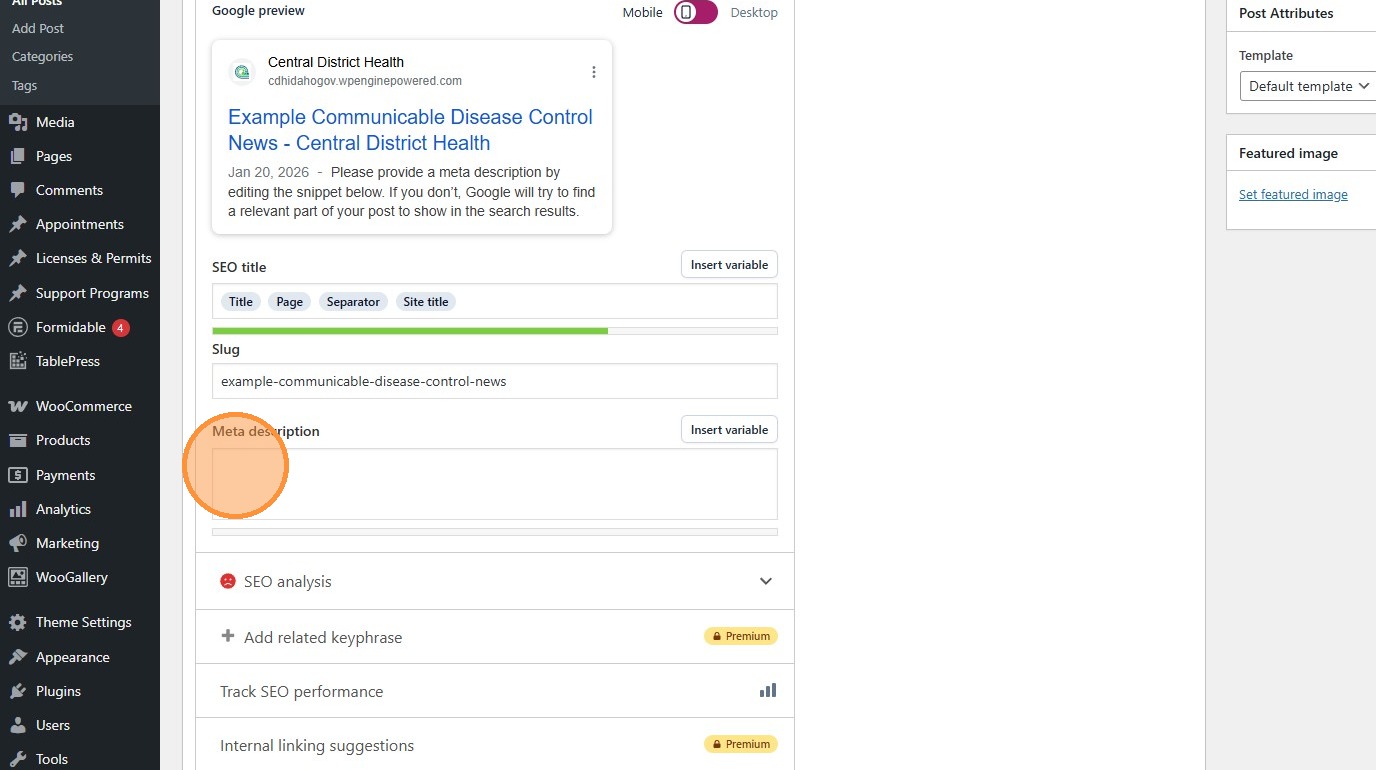
Section titled “10. Back to posts.”Down at the bottom, each post is equipped with a Yoast module.
This is where you can edit SEO-related post attributes such as the meta description, which is read by machines and shows underneath the post when it shows up on search engines.
11. Click “Set featured image” to manually change the image that appears in search results and other summary placements.
Section titled “11. Click “Set featured image” to manually change the image that appears in search results and other summary placements.”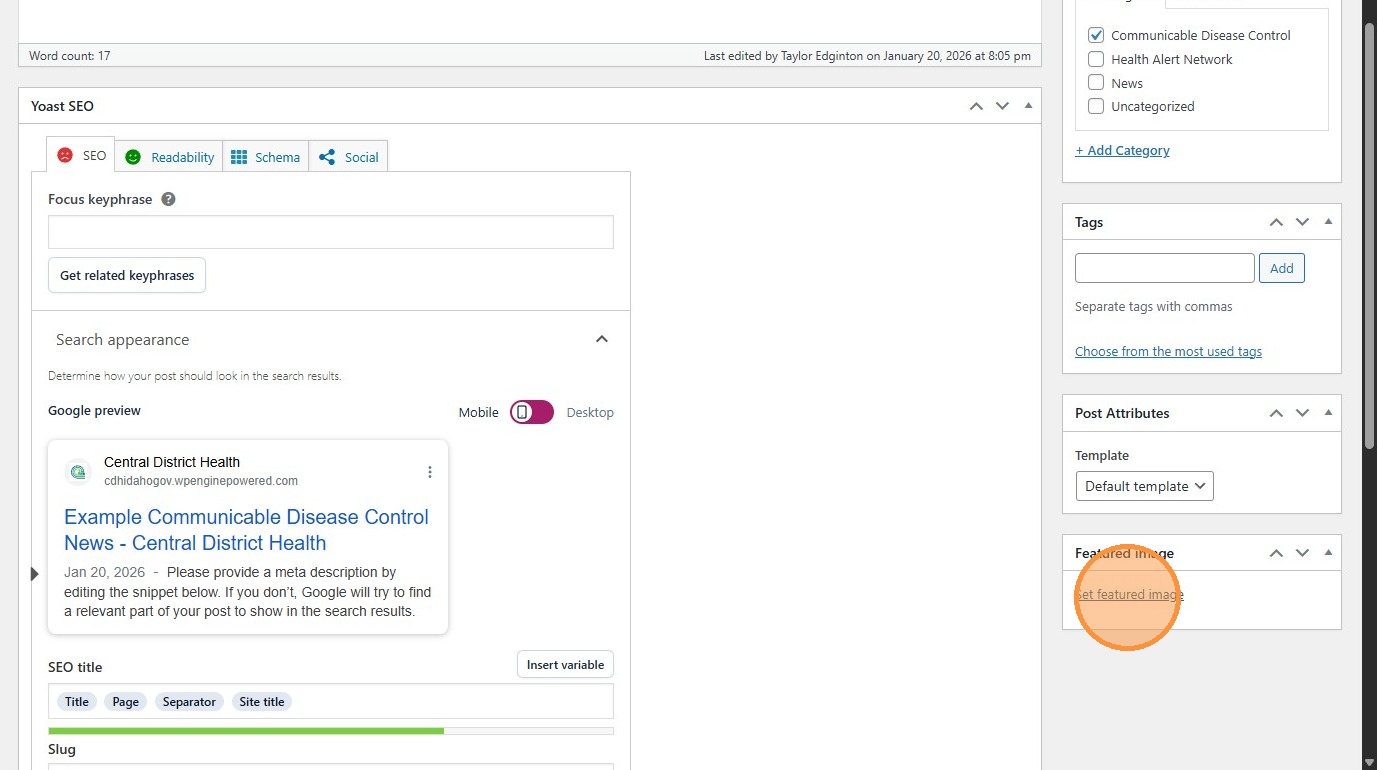
12. Click “Preview Changes” (opens in a new tab) to see your changes before they’re official. The post must be saved as a draft or published to do this.
Section titled “12. Click “Preview Changes” (opens in a new tab) to see your changes before they’re official. The post must be saved as a draft or published to do this.”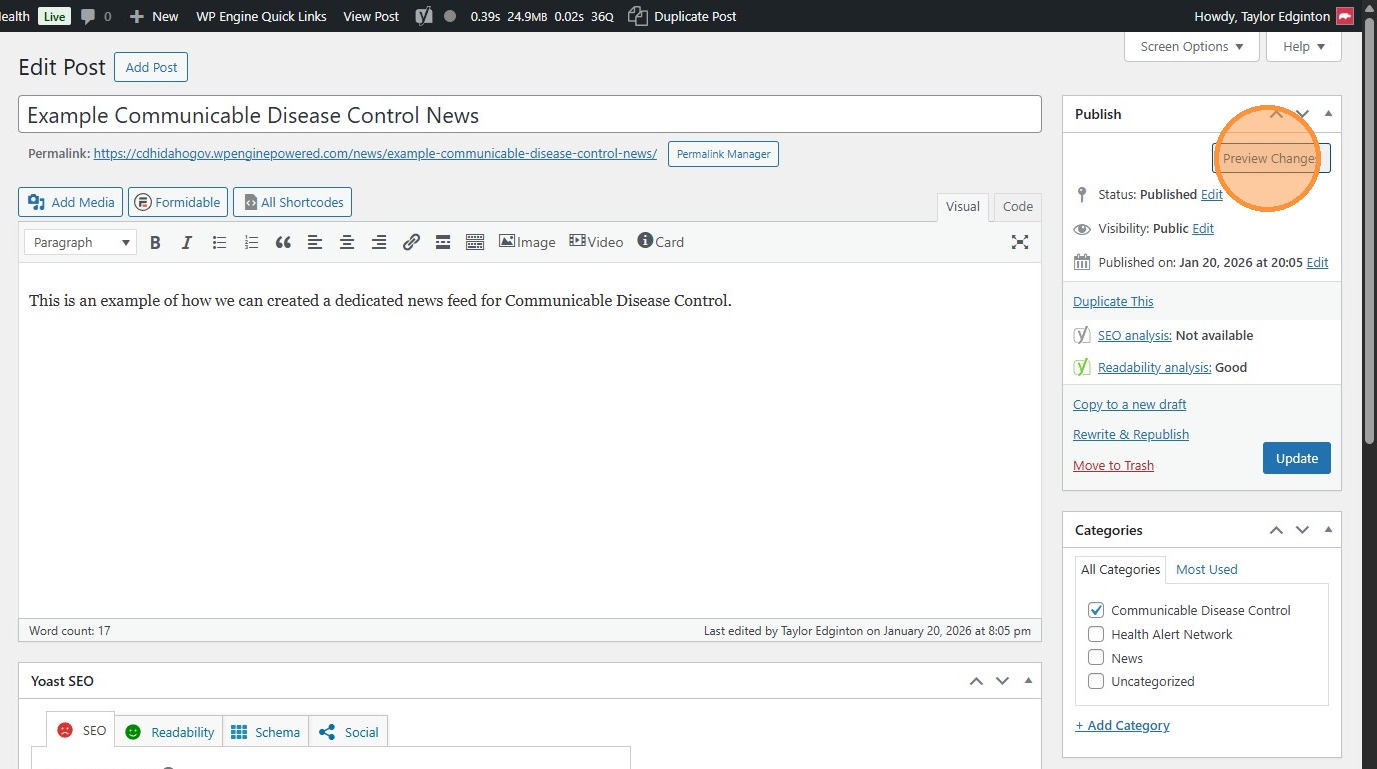
13. Click “Update” to publish changes to the live site.
Section titled “13. Click “Update” to publish changes to the live site.”